We have been keeping our developers busy over the last few months by tasking them with the redesign of our platform. As part of the upgrade, we have rejigged the layout to produce - in our opinion! - a site that is easier to navigate. But fear not, we haven’t simply repackaged the existing site; our developers have been working round the clock to make loading times faster and reports more detailed.
Finding Your Campaign
If you only own one campaign, then you’ll get redirected straight to your campaign when you log in. For those lucky enough to have more than one campaign, you will be directed to the dashboard view, where you will see all of your campaigns listed. On the dashboard view, you will see that there is a handy search field at the top of the page; this can be used to find campaigns by searching for your app name.
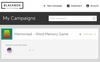
From the dashboard view, you are able to quickly see which Storefronts (iOS App Store regions) you are targeting as well as the ‘historical’ regions you are no longer targeting. And, Brand Protection campaigns are labelled with a ‘Brand Protection Shield’ so they are easily identifiable from the search results.
+ New Campaign
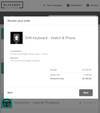
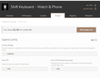
You can create a new campaign by clicking on the +New Campaign button and you’ll find this at the top of the page. You’ll see our Campaign Creation wizard appear to take you through the campaign setup step by step. Once you have selected your app, you can select which Storefronts you would like to target, enter the maximum amount you are willing to pay for a download, and add your own keywords to the campaign. After you have been through these steps, you’ll finish on the review page and be directed to the payment page. You can pay by debit or credit card or PayPal.
Check Campaign Success
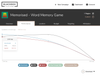
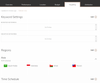
The Overview tab gives a snapshot of how well the campaign is performing and the Performance tab shows the data either hourly, daily, weekly or monthly depending on the date range selected. These two tabs and Location tab (see next section), can be filtered by Storefront so you can see campaign performance for one territory, multiple territories or all territories.
The Performance tab is also where you can access reports generated by the platform. We have a range of CSV reports that contain data to show keyword performance, daily campaign performance and location performance. The reports can be accessed by clicking the ‘Download’ button below the graph.
Location, Location, Location Tab
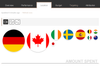
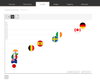
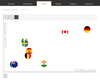
In March 2019, Apple Search Ads increased the number of Storefronts eligible for Apple Search Ads, meaning that your campaign can be targeting up to 59 territories. So, we decided that a quick and easy method to assess location performance was needed. The relative performance of Storefronts can be reviewed for your chosen time frame and Storefronts in the Location tab. The size of the country’s flag indicates how well that Storefront is performing; the bigger the flag, the higher the value relative to your other locations.
For a summary of a territory’s performance, simply click on the flag and you’ll see the clickable metrics appear. Click on a metric to view the Storefronts ordered by your chosen metric in a graph on the second view. The third view allows you to compare the relative performance of two metrics and this can give insights into the efficiency of each Storefront. For example, if I compare Amount Spent with Downloads, I can see whether the Storefronts that are generating the most downloads, are also the most expensive to generate downloads.
£££s
All things money related can be managed in the Budget tab; you can see how much budget you have left, review and edit how much you are willing to pay for a download and set your rate of spend. You can manage how quickly your campaign spends by adjusting your Monthly Budget, which represents the amount of budget you would like to spend in a calendar month.
Campaign Retouches
The Targeting tab is where you can add keywords you would like to increase bids for, and highlight searches you don’t want your ad to show for. Keywords can be ‘boosted’ or ‘negatived’ for one territory, multiple territories or all territories in one go and equally, boosted and negative keywords can be deleted from one, multiple or all territories with the same ease.
You can also edit the demographic (age, gender and type of users) your ad is shown to and where your ad is shown. The Targeting tab is also the place where you can decide which Storefronts to target and which to stop targeting.
Attribution
The Attribution tab is where you can configure your campaign with one of our supported Third Party Attribution providers. Step by step instructions are provided and once you have configured, the Attribution tab is where you will see your post-install event data generated by your campaign.
The Storefronts and the time filter can be applied to the Attribution data; the post-install data shown matches the time filter with the time when the user taps on the Apple Search Ads ad. We match the event data with click time so you can match your Apple Search Ads spend with the revenue and events generated within your app.
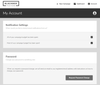
Account Settings
Decide which notification emails you get from us and change your password in your Account settings. Access your account settings by clicking the ‘Account’ icon and then ‘My Account’.
Still have questions about the new platform? Get in touch by emailing admin@blackbox-platform.com or request a demo.